
Canada’s Oceans Now: Arctic Ecosystems
Beluga paper craft
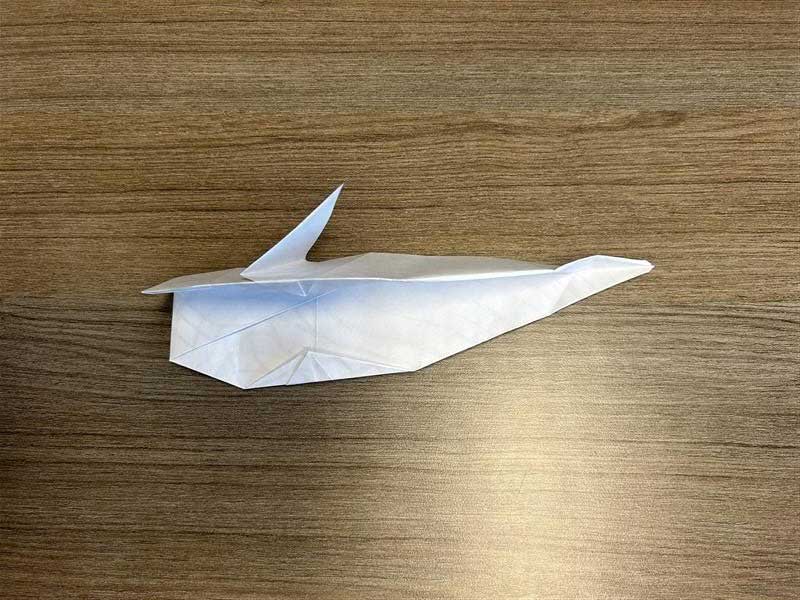
Explore the underwater world of marine mammals with this beluga paper craft! Beluga and bowhead whales adapt to their environment by changing their movements and dive patterns to find different types of food. This page gives instructions for a folding paper craft and photos to guide the creation of a paper beluga.
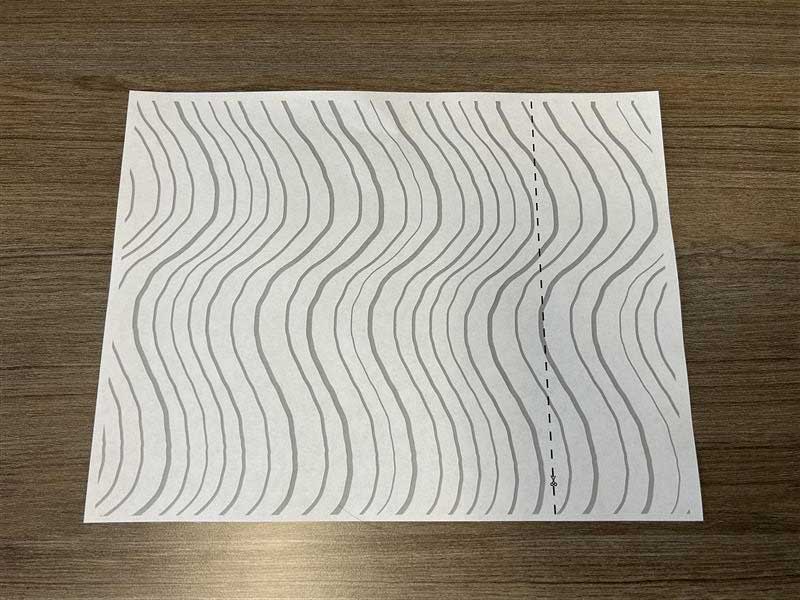
1. Place the paper flat on the table in front of you. Orient it so the shorter edge is closest to you (landscape). You should feel a faint dotted line running along the right edge.
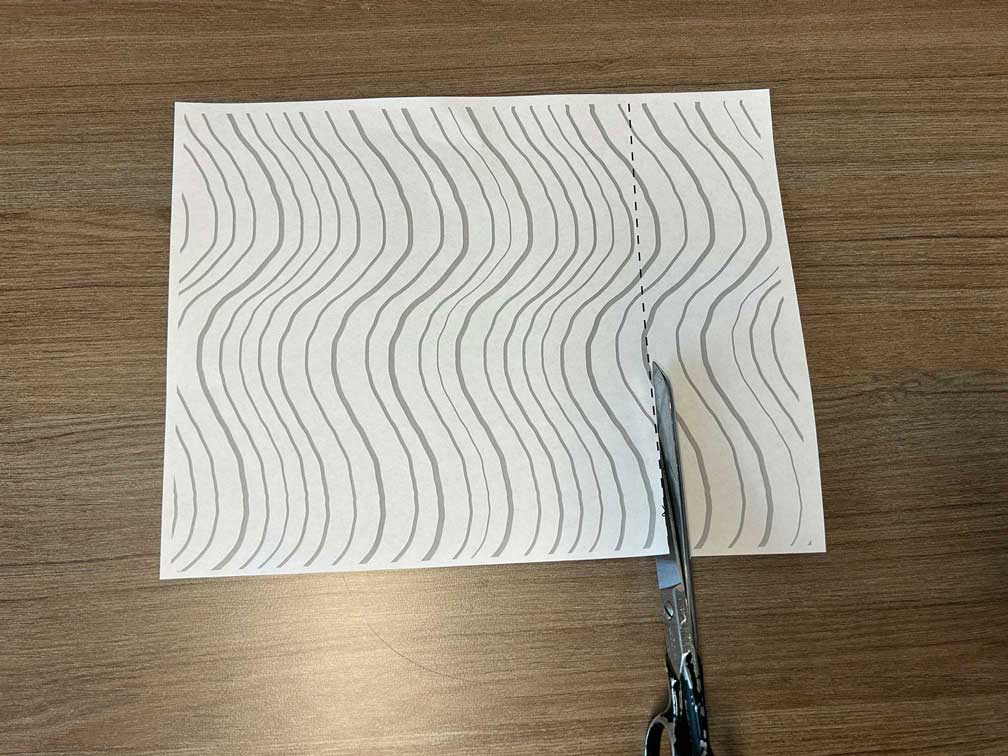
2. Carefully cut along the dotted line. You will now have a square piece of paper.
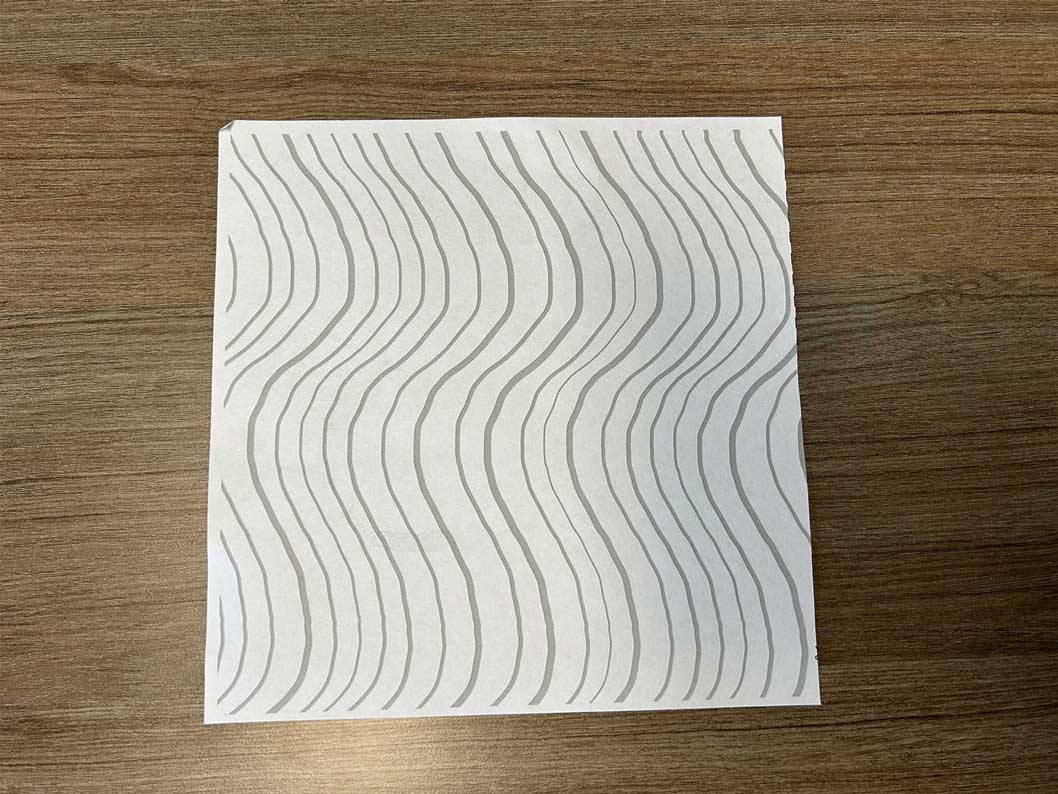
3. Position the square so that one of its sides is directly in front of you.
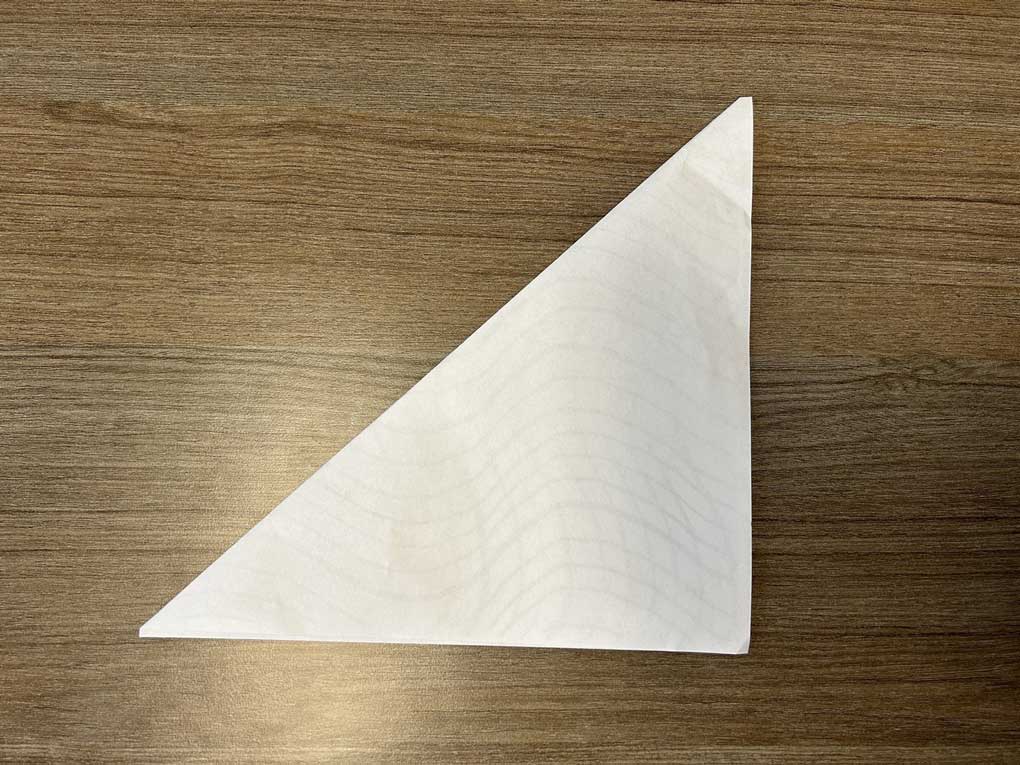
4. Bring the top left corner down to meet the bottom right corner. Crease firmly along the fold line to create a triangle. You should feel a sharp crease running diagonally across the paper.
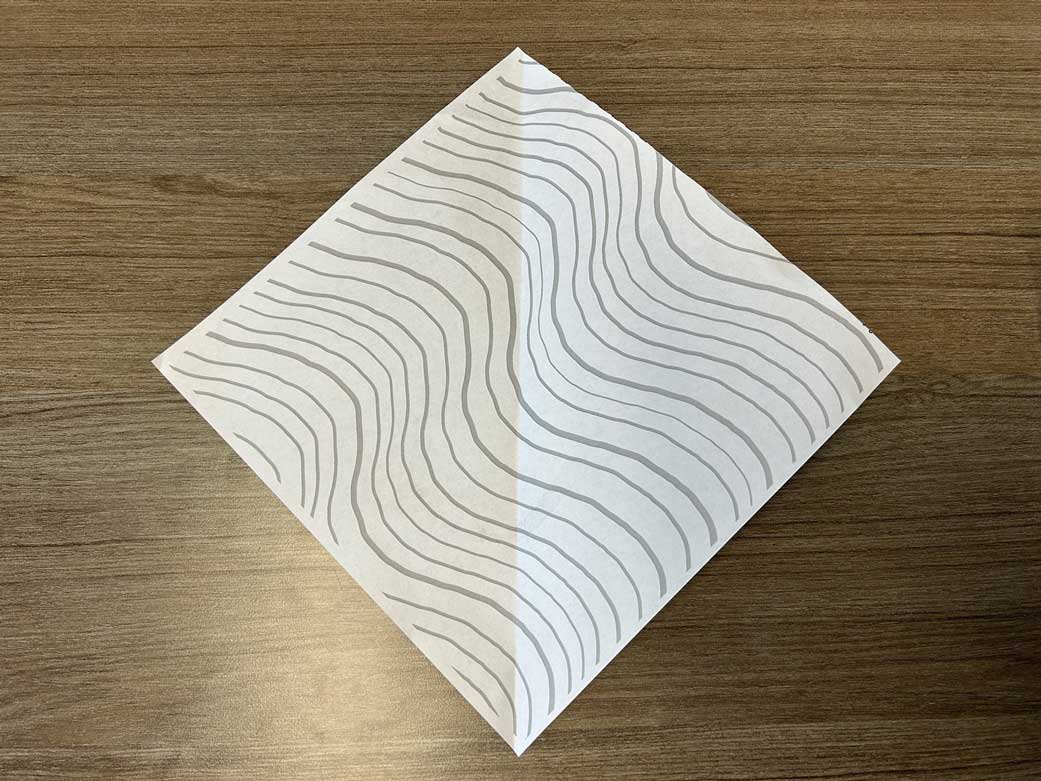
5. Unfold the paper and flatten it. Now, turn the square so that one of its corners is pointing directly away from you (at the 12 o'clock position) and the opposite corner is pointing towards you (at the 6 o'clock position). You should feel the diagonal crease running from the 12 o'clock to the 6 o'clock position.

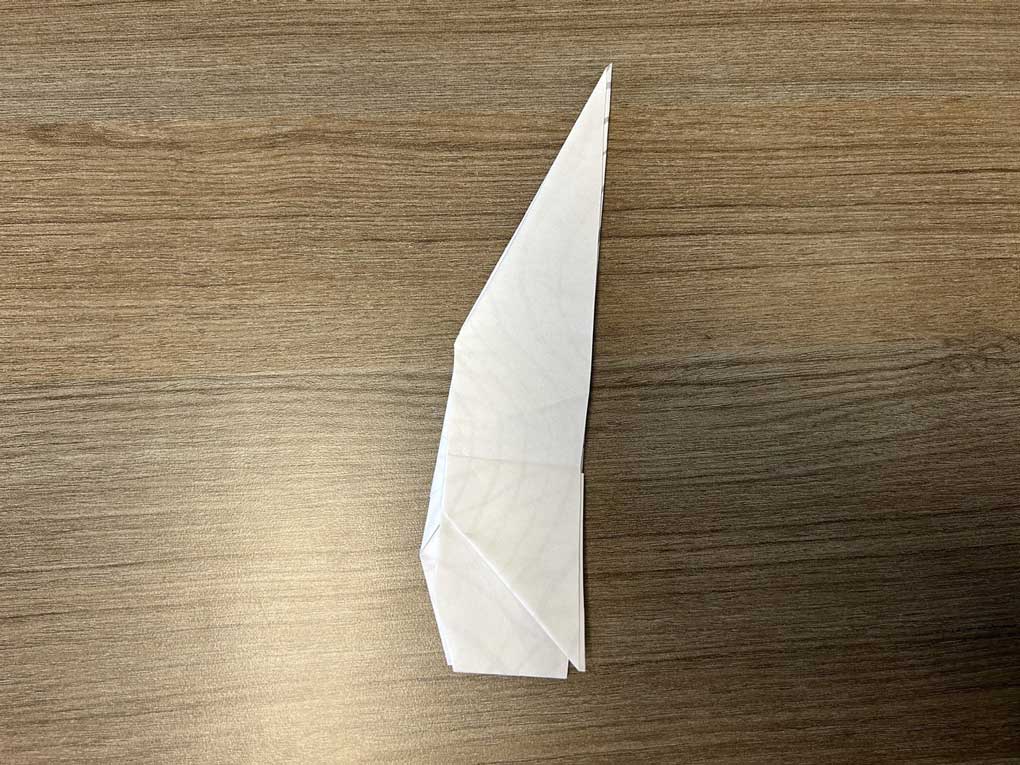
6. Bring the top corner (12 o'clock) down to meet the bottom corner (6 o'clock). Crease firmly to form a smaller triangle. You will feel a new crease running horizontally across the middle of the first crease.
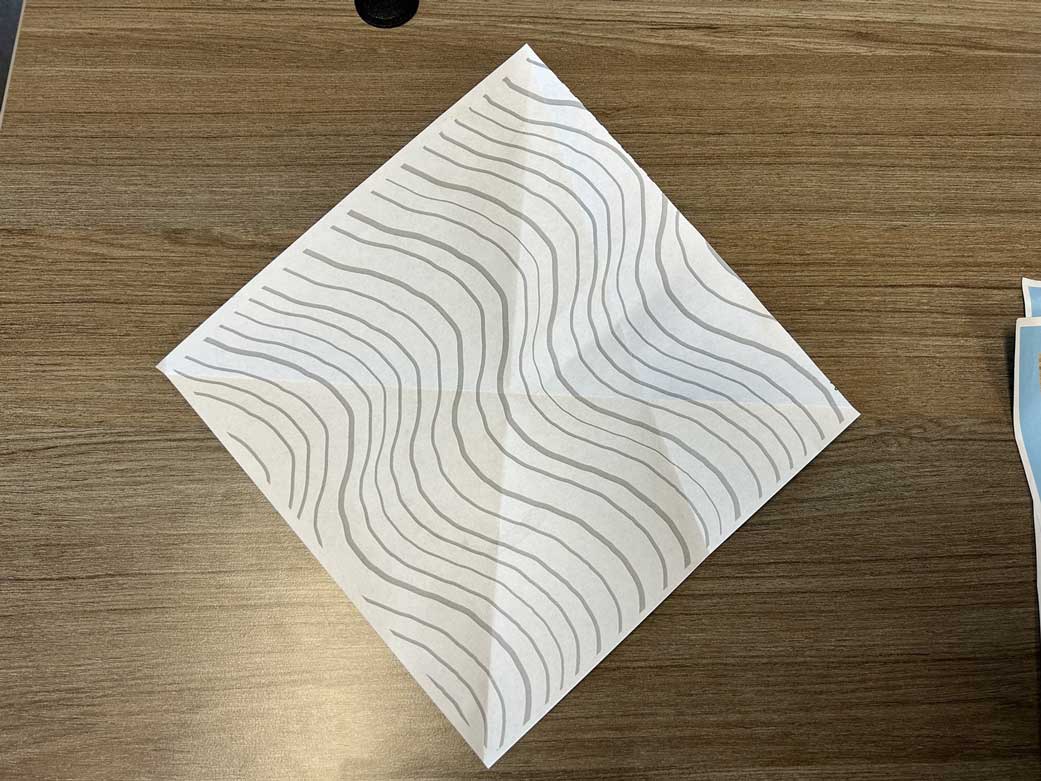
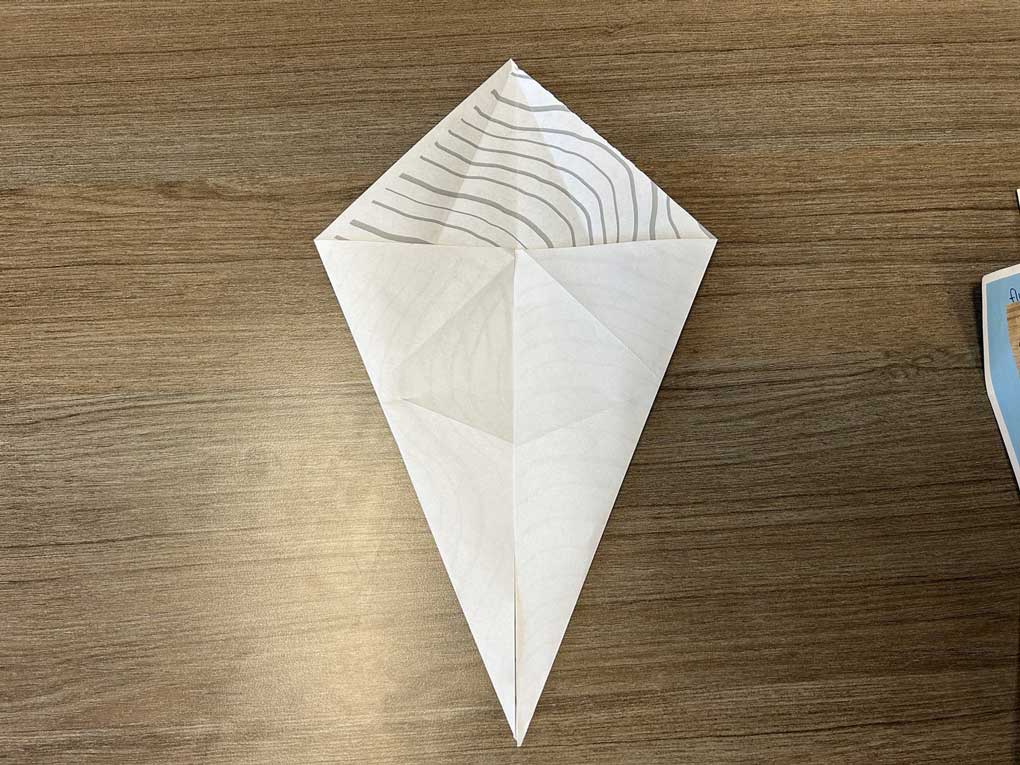
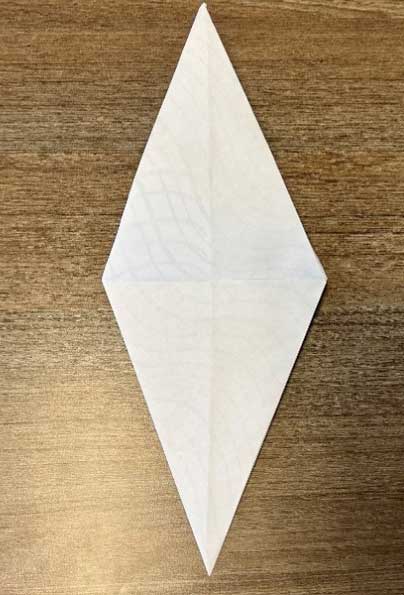
7. Unfold the paper and flatten it back into the diamond orientation (corners at 12, 3, 6, and 9 o'clock). You should now feel two creases: one running vertically from 12 to 6 o'clock, and another running horizontally from 9 to 3 o'clock.
8. Locate the left corner (9 o'clock). Fold this corner down so its edge aligns with the vertical crease in the middle. Crease firmly to form a triangle shape on the left side. Repeat this action with the right corner (3 o'clock), folding it down to meet the same vertical middle crease. You will now feel a smaller triangle shape below the two triangles you just folded.
9. Unfold the paper and flatten it back into the diamond orientation (corners at 12, 3, 6, and 9 o'clock).
10. Locate the left corner (9 o'clock). Fold this corner up so its edge aligns with the vertical crease in the middle. Crease firmly to form a triangle shape on the left side. Repeat this action with the right corner (3 o'clock), folding it up to meet the same vertical middle crease. You will now feel a smaller triangle shape on top of the two triangles you just folded.
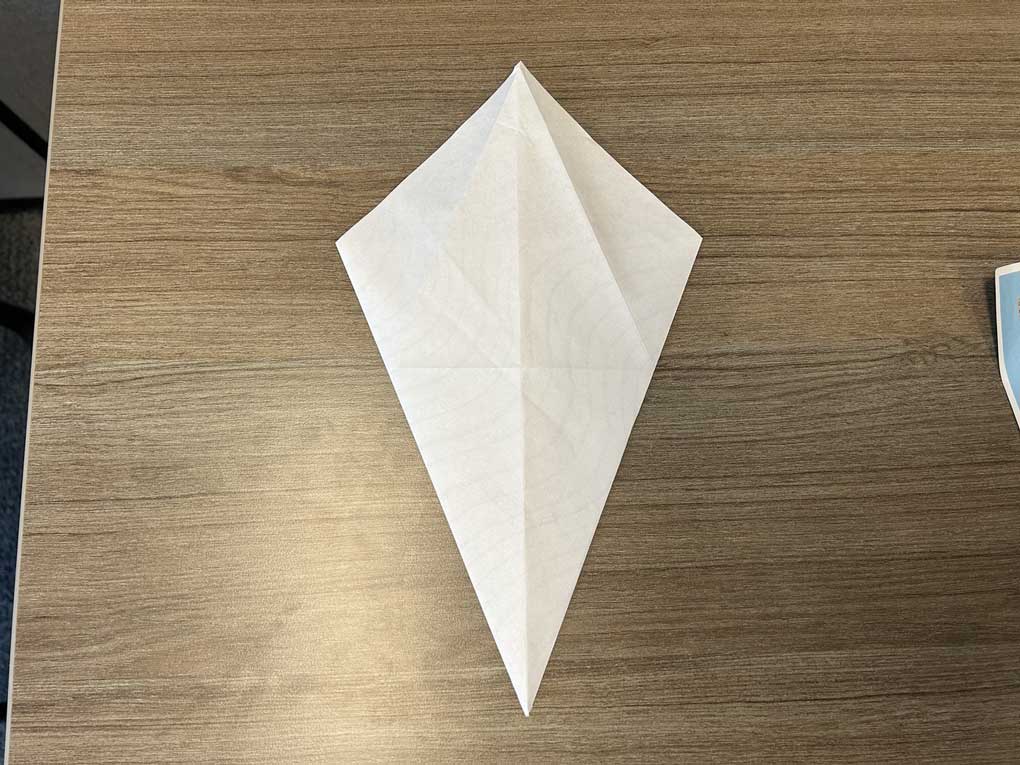
11. Turn the paper over so the side that was facing down is now facing up. You should now feel a smooth, unfolded surface.
12. Locate the bottom corner (6 o'clock). Fold this corner up and away from you, bringing it all the way up to meet the top corner (12 o'clock). Crease firmly along the fold.
13. Flip the paper over again. You should now feel a trapezoid shape on top, and a small triangle shape underneath at the bottom.
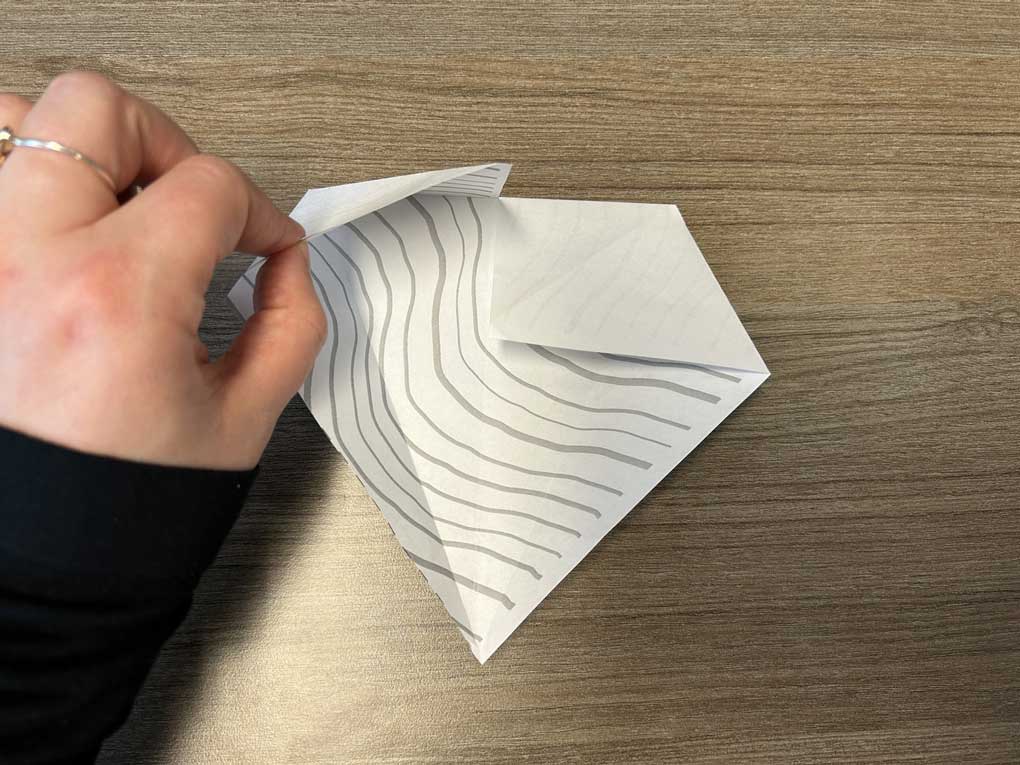
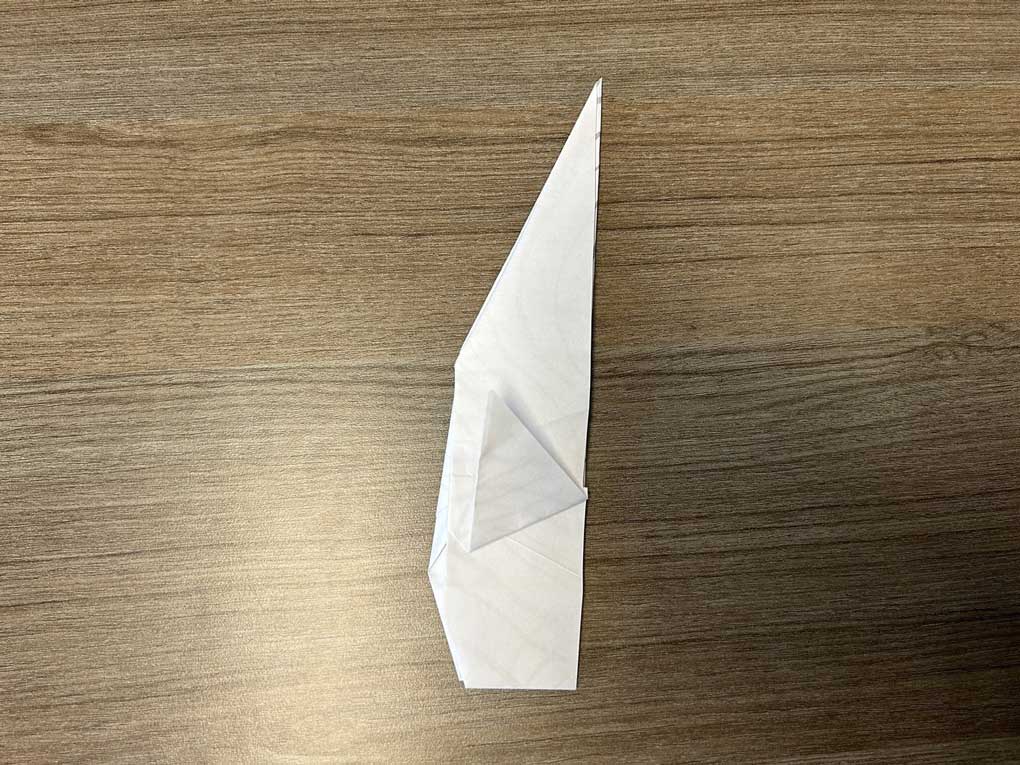
14. On the left side of the trapezoid, feel for the top layer of paper. Lift this layer and fold it away from you, pressing it flat to form a triangle
15. Ensure the newly formed triangle lies flat against the underlying paper.
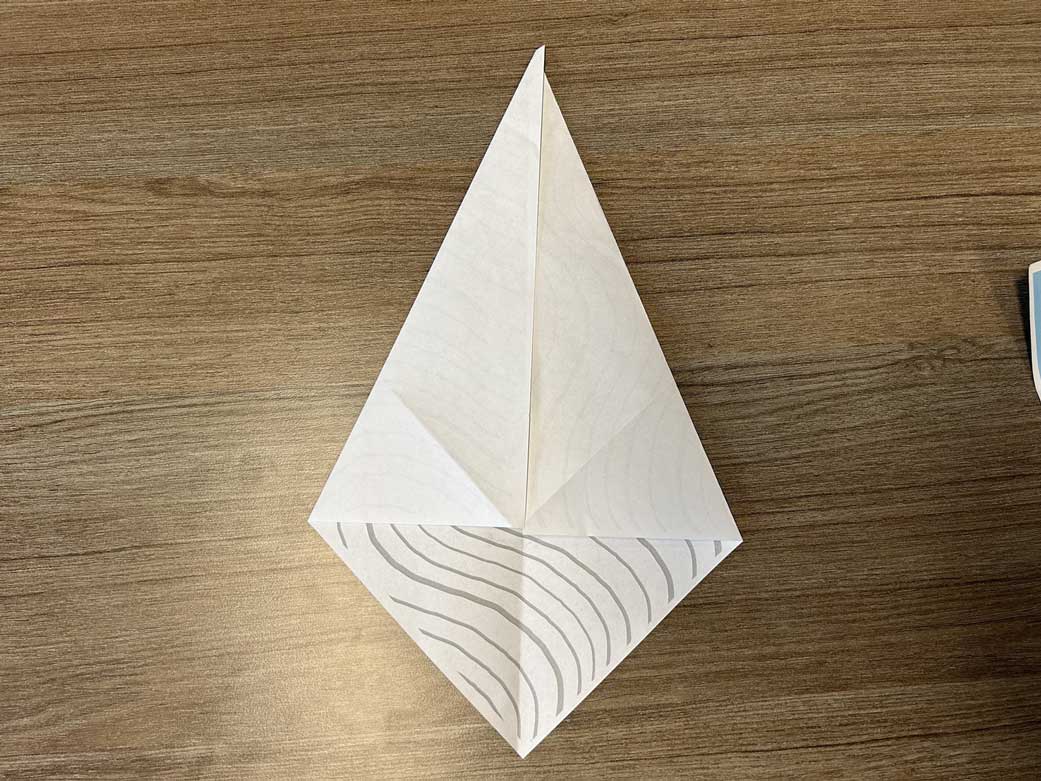
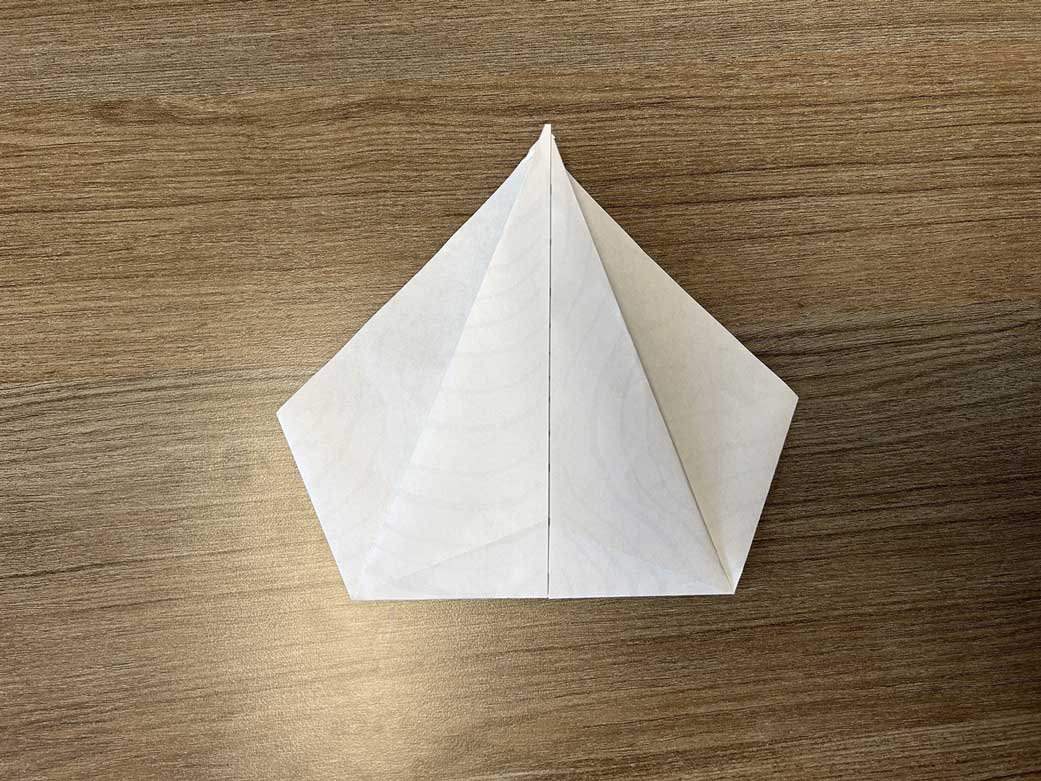
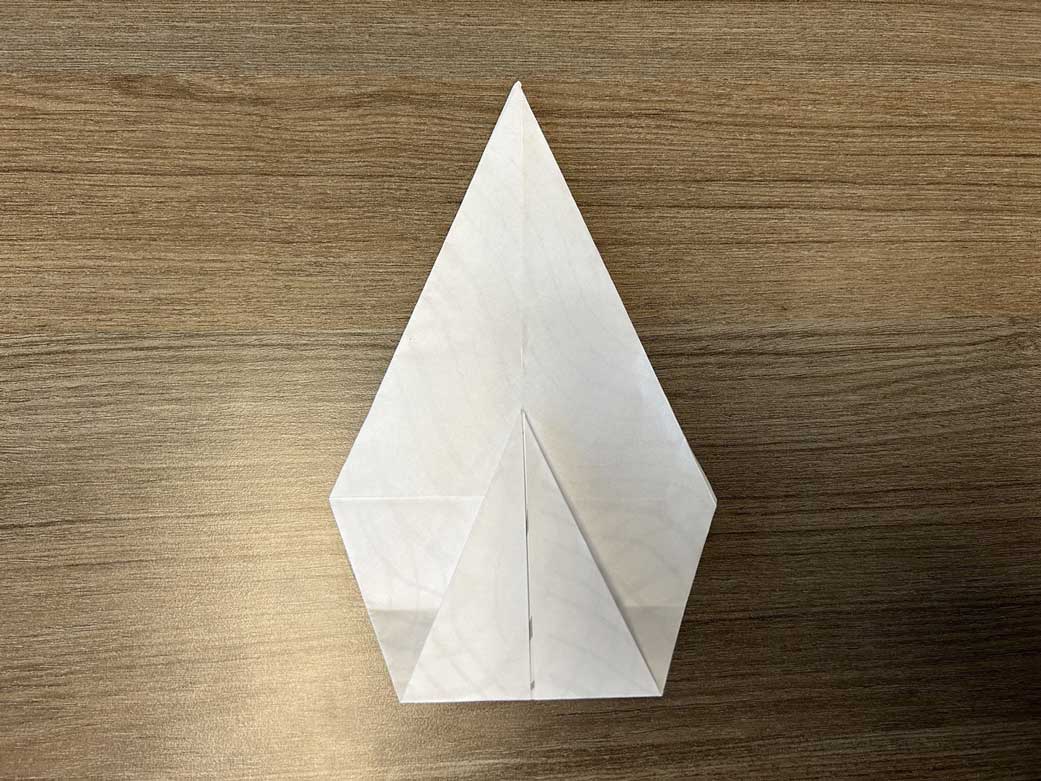
16. Repeat the previous step on the right side of the trapezoid. You should now feel a diamond shape with a smooth surface facing up.

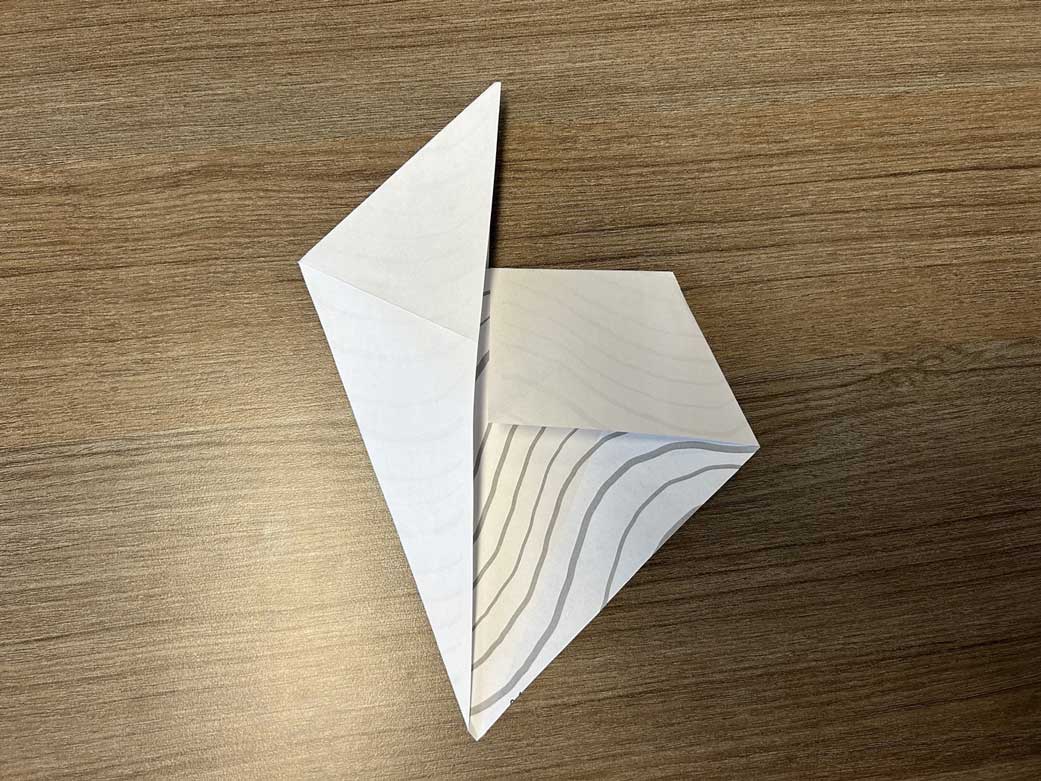
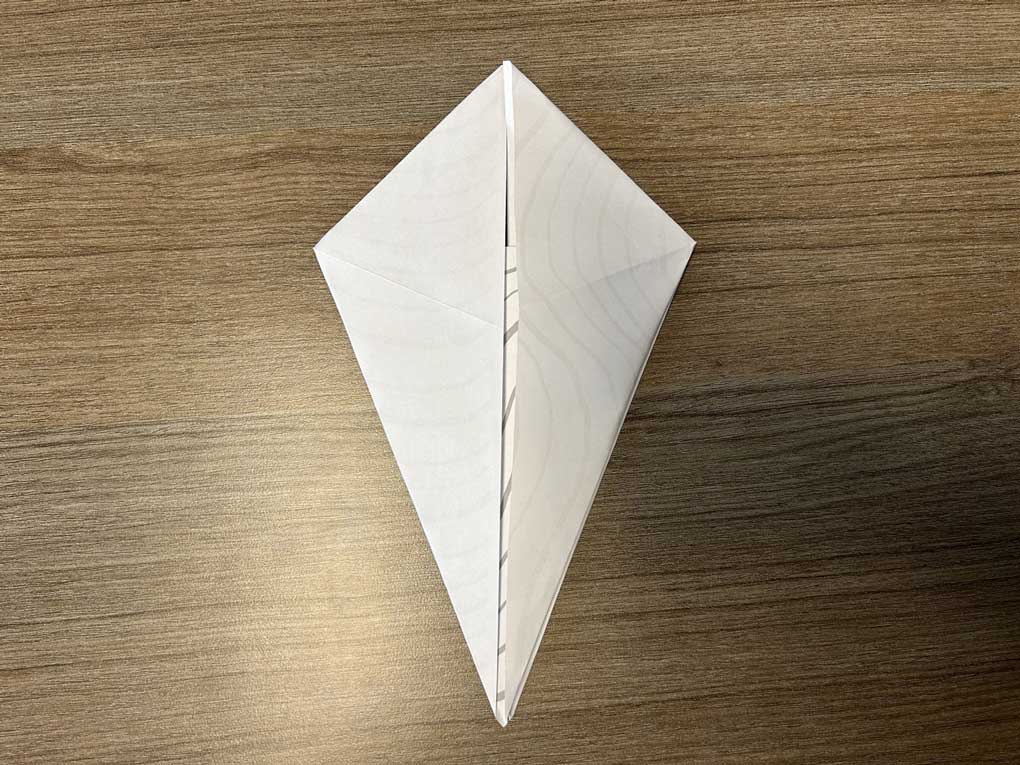
17. Locate the bottom point of the diamond (6 o'clock). Feel for the top layer of paper. Lift this layer and fold it away from you, bringing the point all the way up to the top point (12 o'clock). Crease firmly to form a larger, symmetrical diamond.
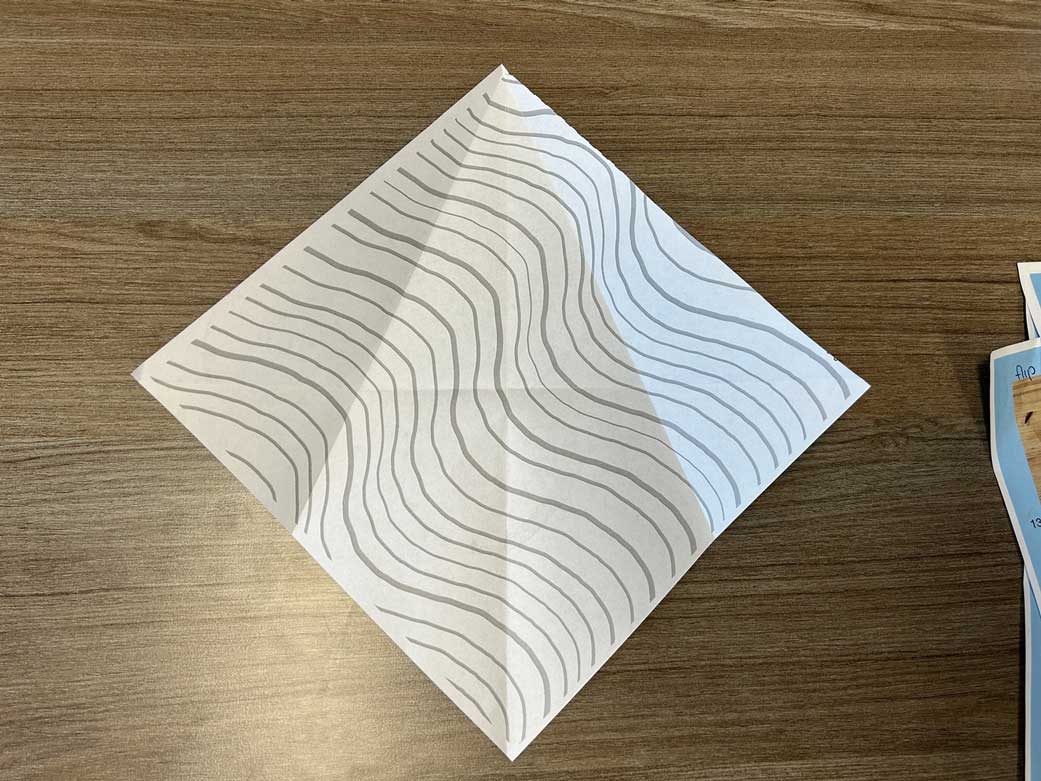
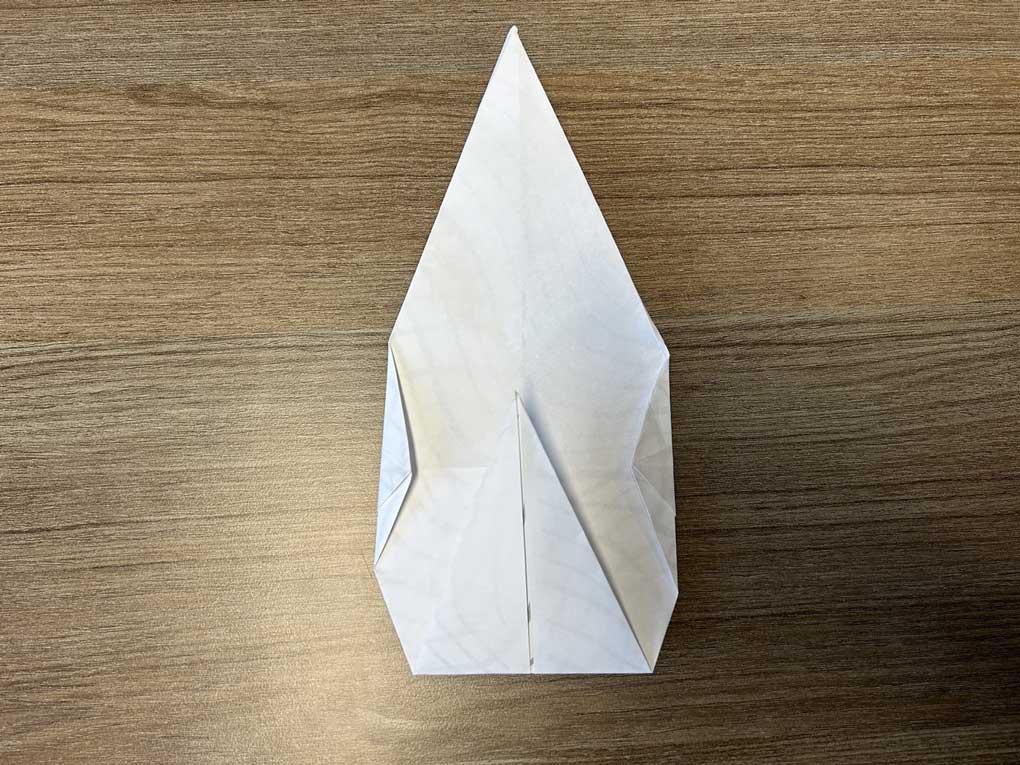
18a. Smooth out the surface of this larger diamond shape.
18b. Smooth out the surface of this larger diamond shape.
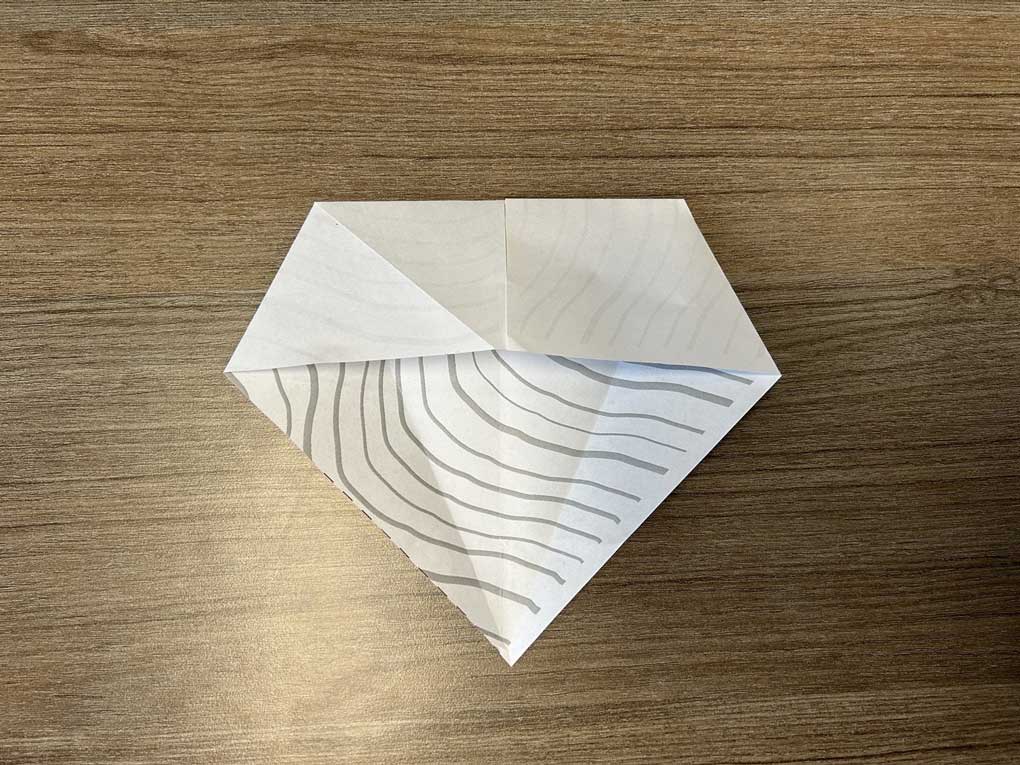
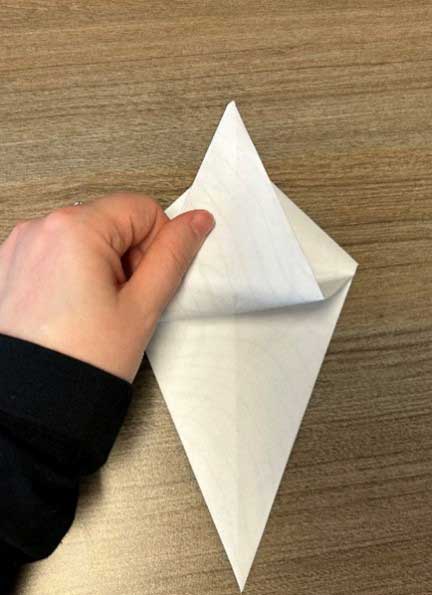
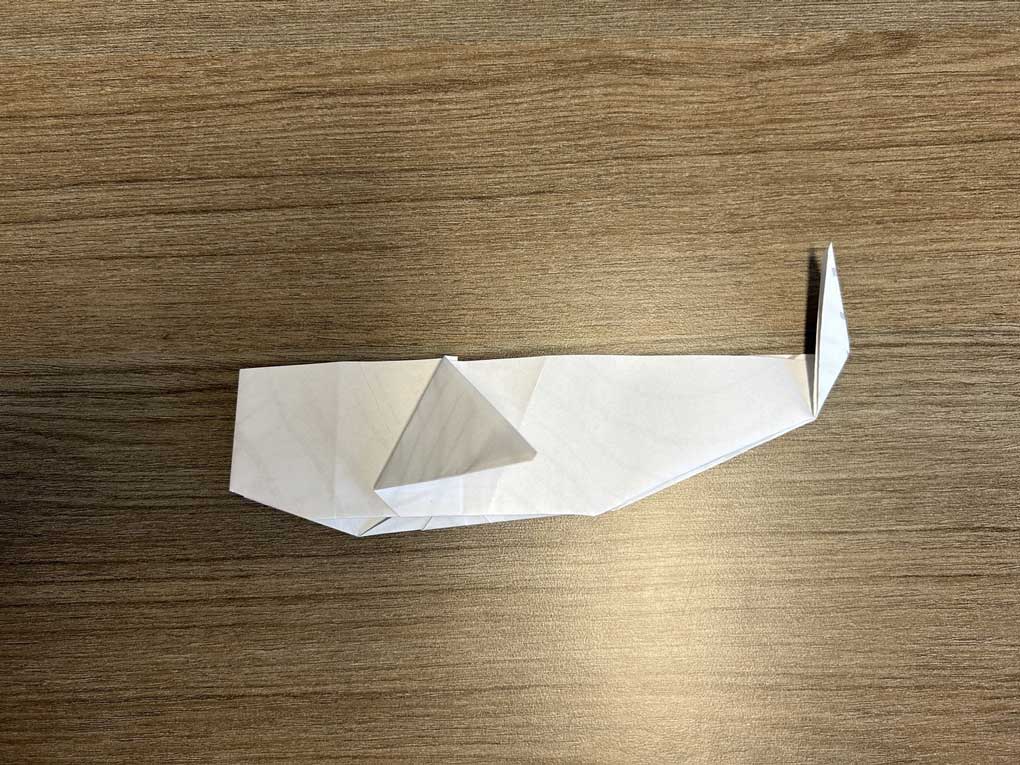
19. Flip the diamond over. You should now feel two small triangle flaps on either side of the middle vertical crease, pointing towards you (towards the 6 o'clock position).
20. Fold both of these small triangle flaps down, away from you, creasing them flat against the paper.
21. Flip the diamond over again.
22. Locate the bottom point of the diamond (6 o'clock). Fold this point up and away from you, bringing it to the horizontal crease in the middle of the diamond. Crease firmly.
23. Gently fold the left and right corners of the diamond inwards towards the middle vertical crease. You should feel a slight narrowing of the diamond.
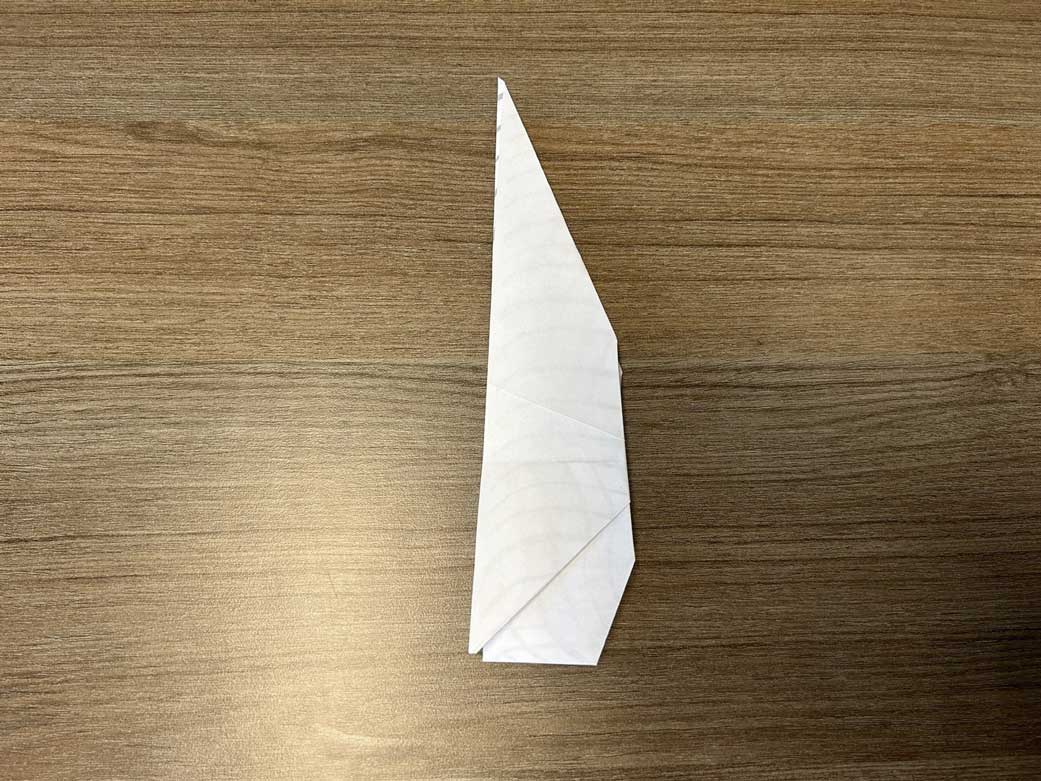
24. Fold the entire paper in half from left to right along the middle vertical crease. You will now feel a small triangle flap pointing upwards.

25. Fold this small triangle flap away from you, towards the narrower top point of the paper. Crease it flat.
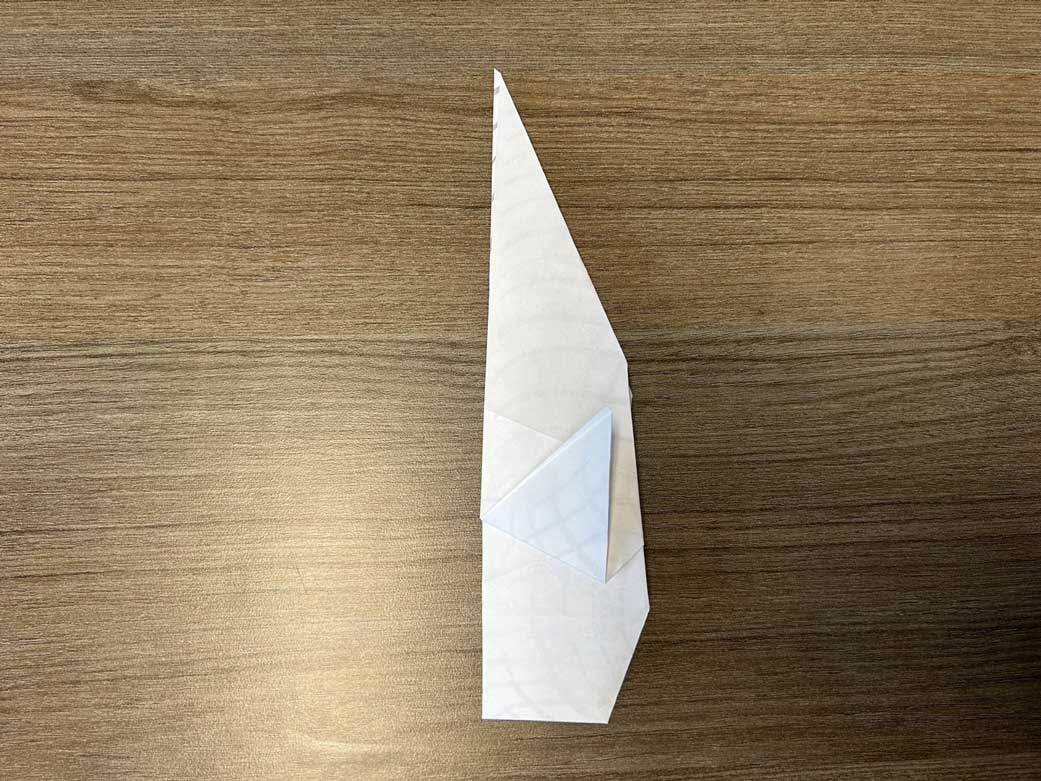
26. Gently press down on the folded flap to secure the crease.
27. Turn the paper over. You should now feel another small triangle flap pointing upwards.
28. Fold this small triangle flap away from you, towards the narrower top point of the paper. Crease it flat.
29. Rotate the entire paper so that the longer edges are now horizontal. Locate the pointy end (which was the top). Fold this point over to one side and crease it. e
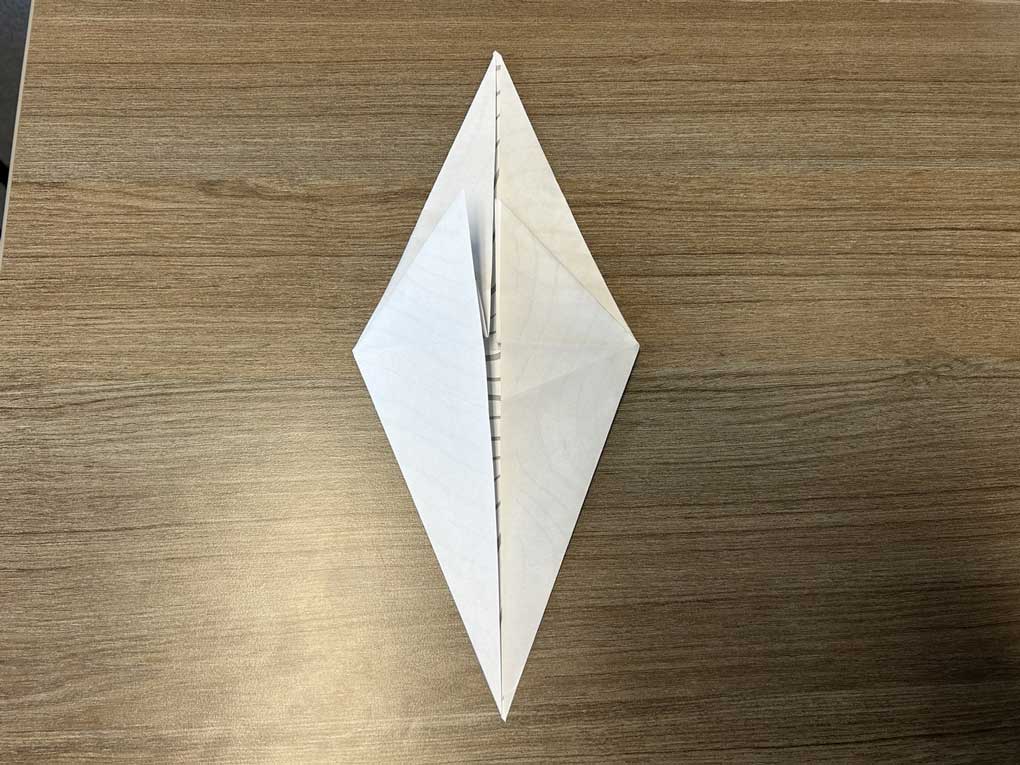
30. Unfold the paper along the middle vertical crease. You should feel the crease running from top to bottom. Carefully make a cut about one inch long starting from the bottom edge, along this middle crease.
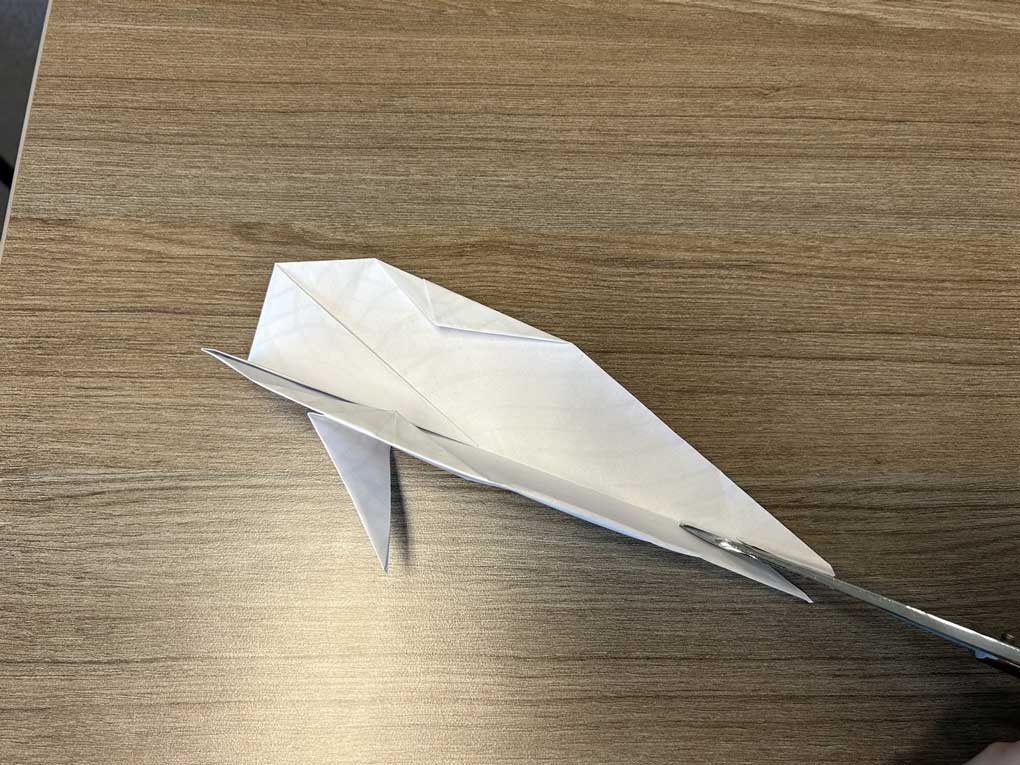
31. Open the cut slightly with your fingers.

32. Gently fold each side of the cut outwards to begin forming the tail.

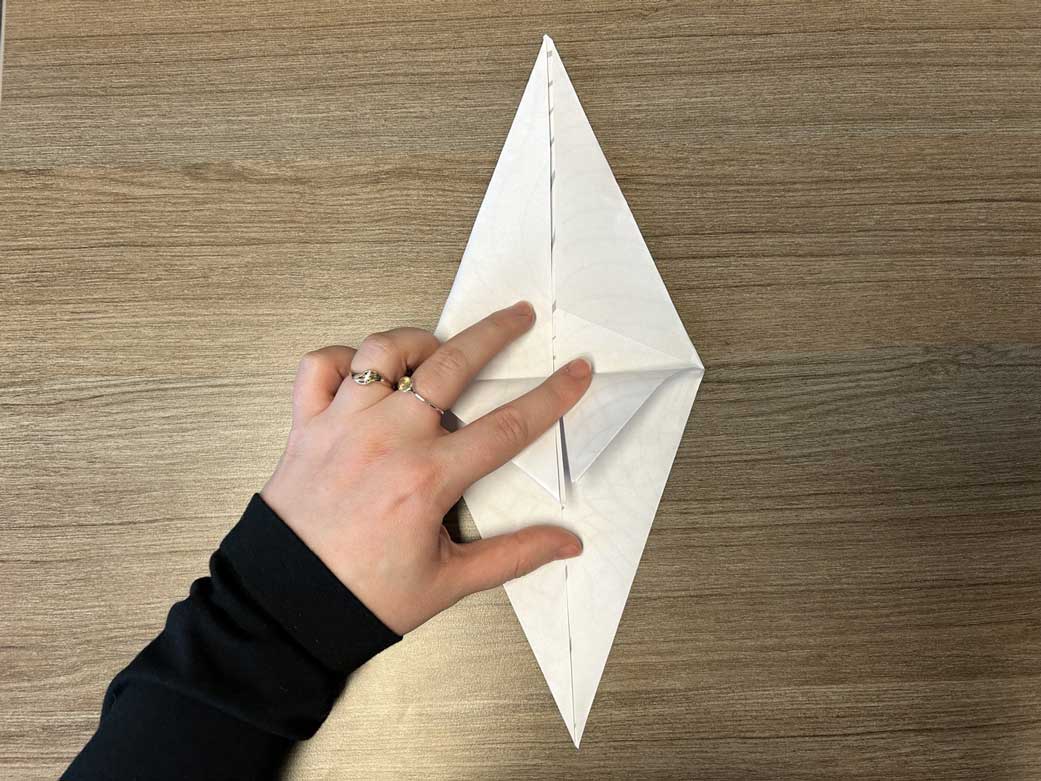
33. Refold the paper along the middle crease. Now, fold the two newly cut tail pieces in opposite directions, creasing them firmly.

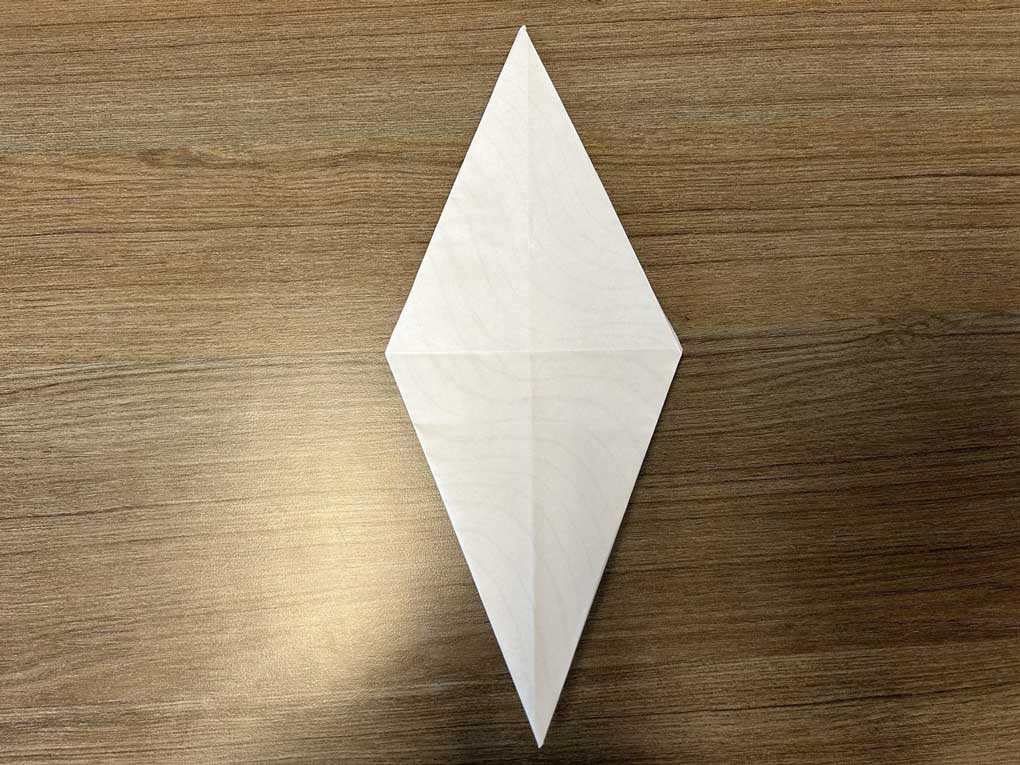
34. Done! You have created a beluga shape.
Page details
- Date modified: