
Catch Certification Authorized Signatory

The Catch Certification Authorized Signatory request allows a licence holder to formally designate or cancel an individual—such as the manager of a buyer, processor, freight forwarder, or logistics company—to act on their behalf in matters related to DFO’s Catch Certification Program and the Fisheries Certificate System (FCS). This is done by submitting a request in the National Online Licensing System (NOLS).
Accessing the National Online Licensing System
For information on how to access NOLS including log in instructions and getting familiar with the system, please visit the website National Online Licensing System - User Training Manual.
Submitting a request and checking the request status: Step-by-step
You can submit licensing requests for licensing services using the online system. To submit a request to DFO, follow the steps below.
Submit request
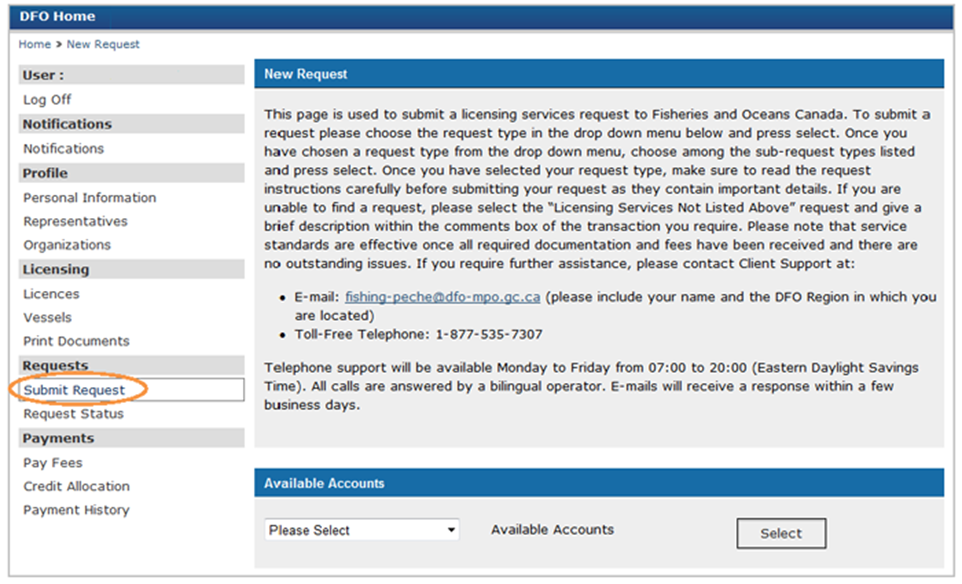
- Click the “Submit Request” link under the “Requests” section of the left-navigation menu.
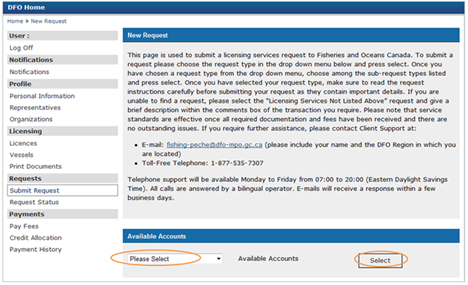
- If you are acting as a representative or if you are submitting a request on behalf of an Organization, then you must select the available account name that you wish to work from.
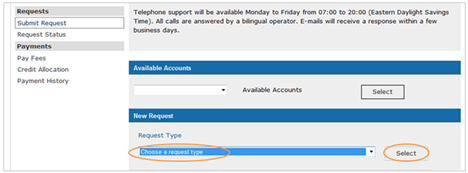
- Choose the request type “Catch Certificate Signatory Request” from the drop-down menu, once you have chosen the request type, you will need to click on the select button.
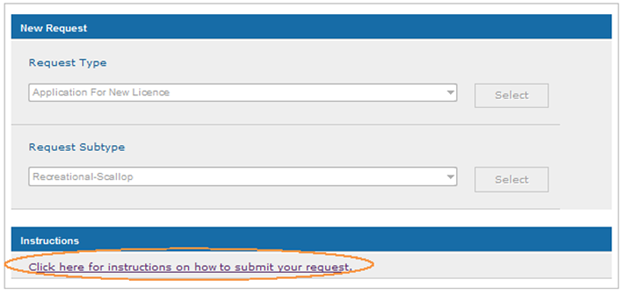
- Choose the request sub-type “add a signatory” or “remove a signatory” from the drop-down menu, once you have chosen the request sub-type, you will need to click on the select button.

- Click on the Instructions hyperlink “Click here for instructions on how to submit your request.” These instructions will open in a new window and will provide a description of the request, as well as all of the details you will need in order to submit the request.
Insert the request details by clicking into the “Comments” box and providing one of the statements below:
- I authorize (Company Manager) of (Company Name) to act as my authorized signatory and to conduct business on my behalf with DFO’s Catch Certification Program.
- I no longer authorize (Company Manager) of (Company Name) to act as my authorized signatory and to conduct business on my behalf with DFO’s Catch Certification Program.
Note: If you are unsure who to list as the company manager, please contact the company or the Catch Certification Program and they can provide it to you.
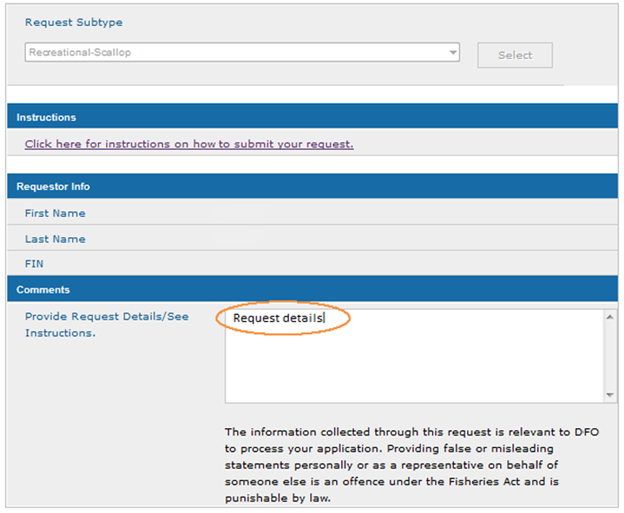
- Click on the “Submit” button to submit the request. Click on the “Cancel” button to cancel the request.
Note: A unique request ID number will be generated once you have submitted your request. Please include this number in all your correspondence with the department.
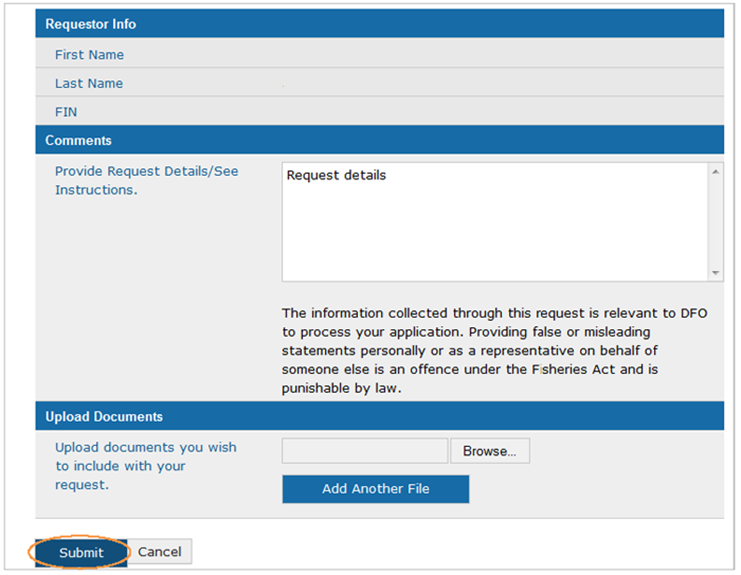
Note: You will receive a notification in your account under the “Notifications” screen when you have submitted a request. You will not be informed of any changes to your requests by email or through the “Notifications” screen. Follow the steps below to check on the status or amend your request.
Checking a request status and modifying a request
- Click on the “Request Status” link under the “Requests” section of the left-navigation menu.
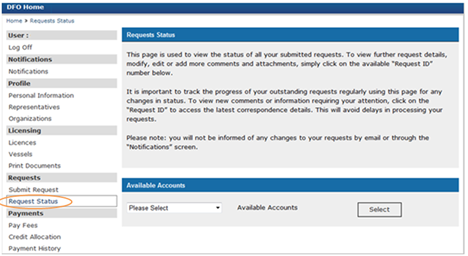
- If you are acting as a representative or if you are submitting a request on behalf of an Organization, then you must select the available account name that you wish to work from.
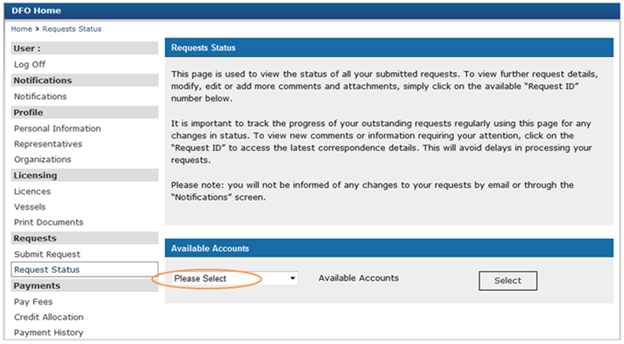
- Select the “Request ID” link to open the Request Type you want to view in more detail.
Please note the Request ID number associated with this request. All subsequent exchanges regarding this request must be done via NOLS using this request number.
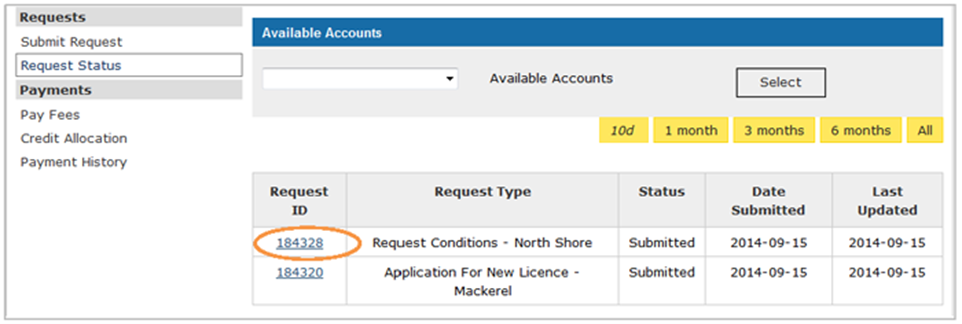
- You can still see the Instructions and Request Details for this request and can now take note of the Request ID for future reference.
Please note that if your request was made more than 10 days ago, you will need to select an increased time span using the options above (e.g. 1 month).
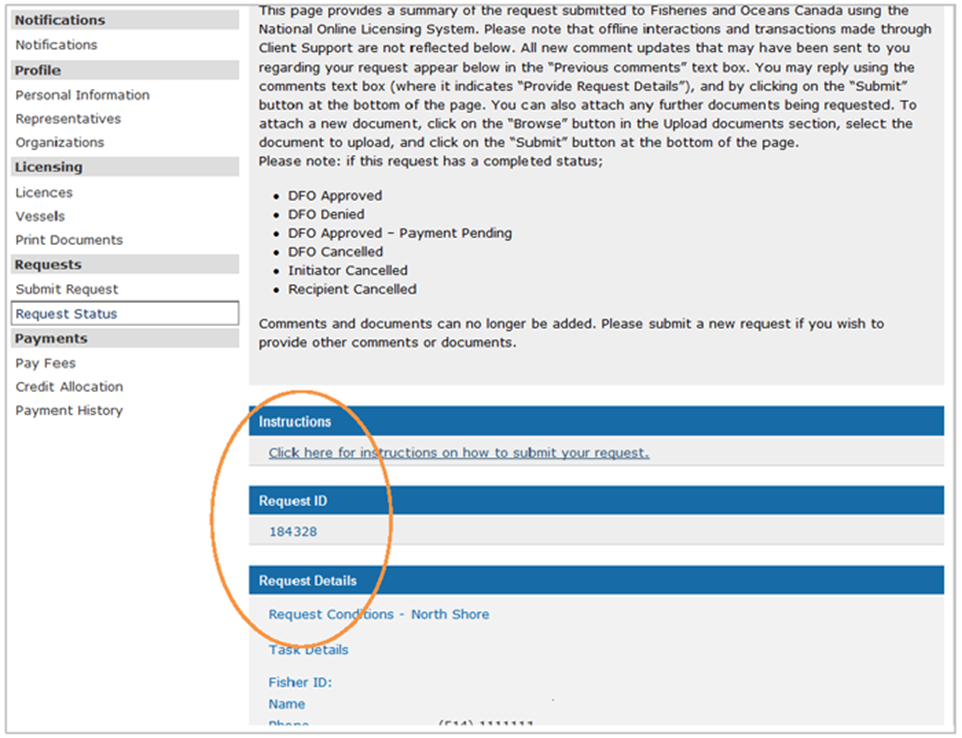
- If you wish to amend your request or provide additional information, you can do so by clicking into the “Comments” box.
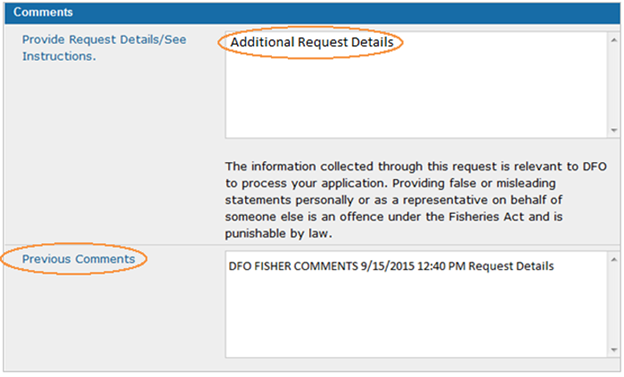
Note: You can now view any previous comments. This may include the comments that you inserted when you submitted the request, as well as additional comments that Fisheries and Oceans Canada may have made.
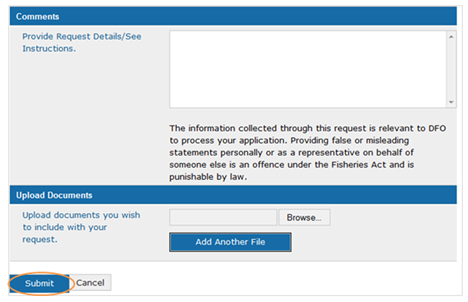
- Click on the “Submit” button to submit the request. Click on the “Cancel” button to cancel the request.
Next steps
Upon receipt of your application, DFO will conduct a thorough review.
If the department determines that additional information is required, you may receive a message within this request asking for additional details.
DFO aims to make a decision on requests within 10 business days. This service standard applies only once the file is considered complete by DFO.
You will receive e-mail notifications when modifications are made to your request by DFO (for example: more information has been requested, the status of your request has been updated).
You will be notified of DFO's decision (approved or denied) within this request in your NOLS profile.
- If your request is approved, the status of your request will be “DFO Approved” and the signatory will receive notification that you have been added to their list of harvesters.
- If your request is denied, you will receive a comment within this request in your NOLS profile explaining the reason for this decision (e.g. incomplete or incorrect information).
Contact the National Online Licensing System
Availability
Monday to Friday:
- 7:00 am to 17:00 Eastern
- 7:00 am to 19:00 Eastern for Alberta and British Columbia
Toll-free: 1-877-535-7307
Email: fishing-peche@dfo-mpo.gc.ca
Page details
- Date modified: