
Tutorial: Restoration action dashboard
Toggle layers (on and off)
In the top-right corner of the map, see the Layers button. This button lets you toggle the restoration action sites on and off. It also allows you to see more sublayers.
To do so, select the Layers symbol.

The restoration actions and restoration goals, important areas, and context data layers will pop-up.
Then select > to open a layer list to find the related layers within each heading.
To toggle layer visibility, select the eye symbol ![]() . This symbol means the layer is visible. If there is a line through the eye
. This symbol means the layer is visible. If there is a line through the eye ![]() , the layer isn’t visible. The eye symbols can also apply to the heading and grouping of the layers.
, the layer isn’t visible. The eye symbols can also apply to the heading and grouping of the layers.
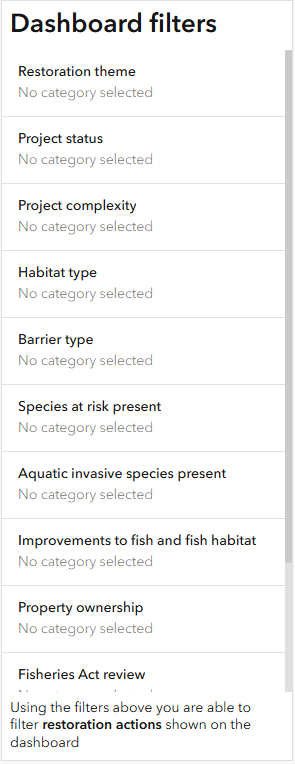
Filter sites
On the left side panel of the dashboard, see the Dashboard filters panel. This panel lets you filter the restoration action sites. Filters include:
- Restoration theme
- Project status
- Project complexity
- Habitat type
- Barrier type
- Species at risk present
- Aquatic invasive species present
- Improvements to fish and fish habitat
- Property ownership
- Fisheries Act review
- Species at Risk Act review
- Aquatic Invasive Species review
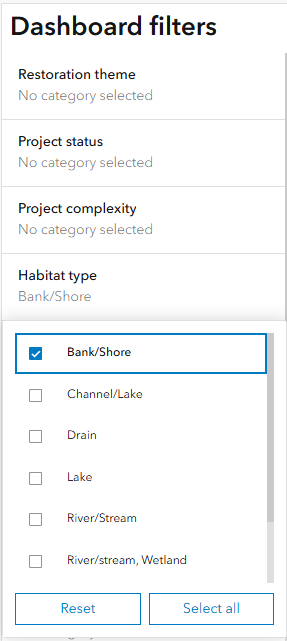
To filter the sites on the map, click the field and category you would like to filter by. Repeat this process for more categories. The species at risk critical habitat dashboard filter only filters the DFO critical habitat layer when its visibility is turned on in the ‘Important areas’ section.
To clear all filters, click the reset option (bottom left).
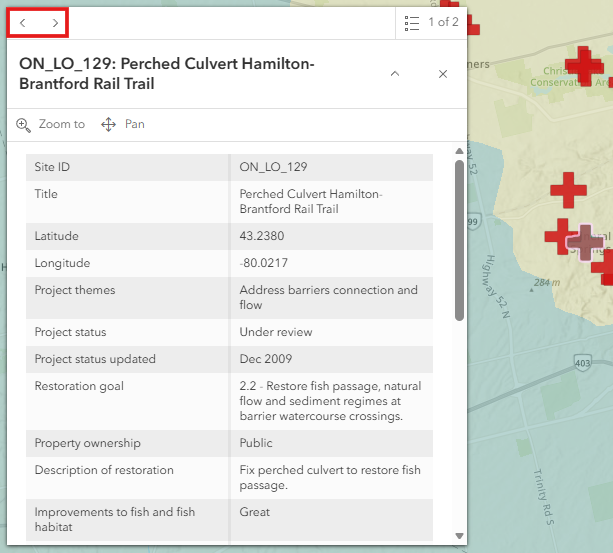
Select a site
To select a site, zoom in to the site and click the restoration action icon on the map. As shown in the image on the left, once a site is selected, the restoration icon will show in a bounding box. A pop-up of the site-specific information will appear on your screen.
When multiple sites are close to each other, clicking on an icon can select the feature button (top right of the pop-up) to toggle between the pop-ups for each site (see box at top left of image below).
- Date modified: