
Tutorial: Add Data
To find widgets in the atlas, see the user guide.
The Add Data widget gives you access to additional data features within the atlas. It allows you to add data to a map by searching for layers through ArcGIS Living Atlas of the World (English-only website with bilingual data) and Fisheries and Oceans Canada content, entering URLs or uploading local files. By doing so, you can temporarily add or remove layers from a map.
The atlas has libraries of categories specific to marine spatial planning, including one library that includes all marine spatial planning data. These libraries include the following:
- ecosystem and ocean knowledge
- local, socio-cultural and traditional knowledge
- boundaries and management areas
- human use
- synthesis areas
- impacts and threat assessments
It is important to note that you can't save added layers to a map. You can use the Print widget to save and review added layers.
Step
- Click on the Add Data widget.
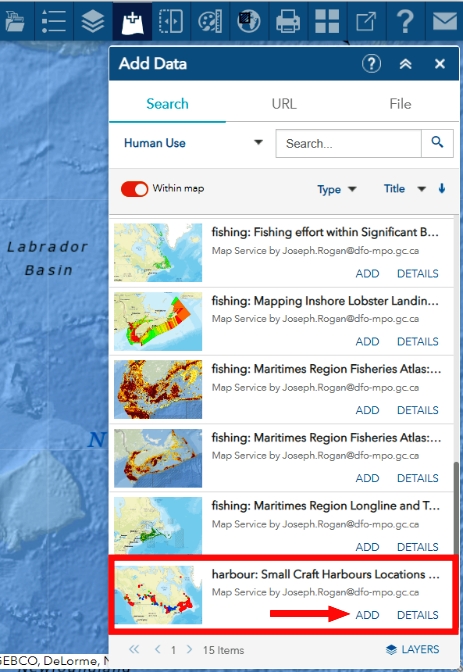
- Select the data library of interest from the themes in the drop-down menu. In this instance, we have chosen Human Use. You will see a curated list of Human Use data related to marine spatial planning that you can choose from
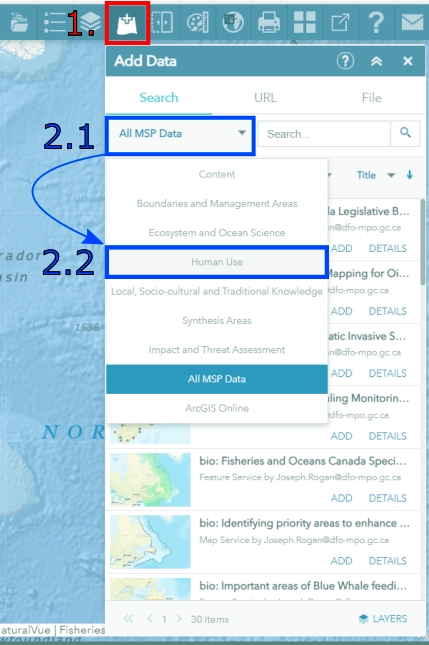
- Select the data you're interested in and click the ADD option.
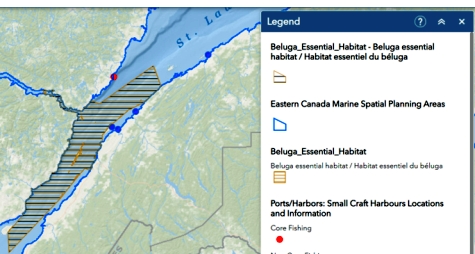
Your data layer will appear as shown below.
Once you've added your data, the ADD option will be replaced by REMOVE. If you chose the wrong data layer by mistake or decide that you don't want to display it any longer, click REMOVE.

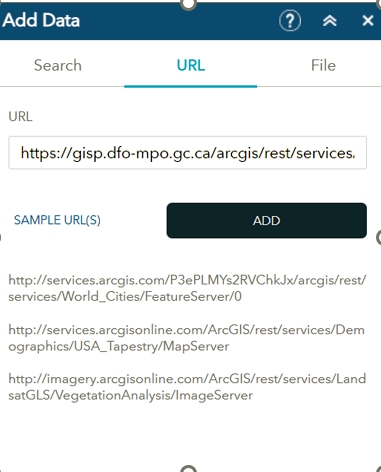
- To add your own data from a URL or a file, press the URL option and copy and paste your data URL into the text box. Then press the ADD button. The URL selected here is from the Government of Canada's open data. We have selected Beluga Whale Essential Habitat data. You can also add your own data files to the atlas.
- Click the Legend widget to see your added data.
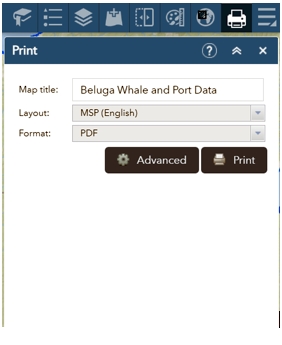
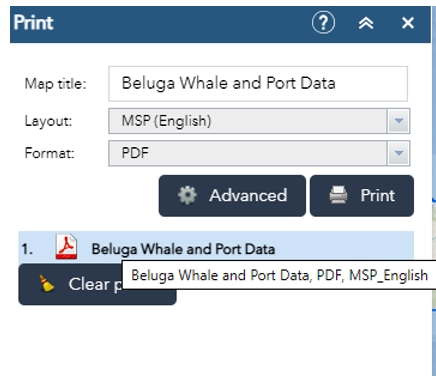
- Since you cannot permanently save added data in the atlas, one way to capture it is through the Print widget. Make sure your map extent is in the desired area that you want to capture. Click on the Print widget and type the title of your map in the text box. Name your PDF and click the Print button.
- A PDF will appear after completing step 5. Click on the PDF icon to open the completed map in your internet browser.
- You can save the file on your computer and then share it with colleagues.
- Date modified: